- Data Professor
- Posts
- How to Build a Simple Portfolio Website for FREE
How to Build a Simple Portfolio Website for FREE
Step-by-step tutorial from scratch in less than 10 minutes
Chanin Nantasenamat
May 28, 2021

In this article, you will learn how to build a portfolio website for free in order to showcase your projects whether it be for data science, software development or web development. Some of the benefits of a portfolio website helps potential employers see the breadth and depth of your experience, which may be particularly helpful if you’re coming from an unconventional background (such as being a self-taught professional, etc.).
The portfolio website that we will be building today will be hosted for free on on GitHub pages. I will assume that you have minimal to no HTML experience. But if you have prior experience, this tutorial should take you even less time to complete.
We have a lot to cover here and without further ado let’s get started!
Also check out the accompanying YouTube video by the same name (How to Build a Simple Portfolio Website for FREE) that you can watch alongside reading this blog post.
1. Sign up for a GitHub account
As we’re going to host the website on GitHub Pages, a prerequisite is to have a GitHub account. So if you don’t already have one, go ahead and sign up for one.
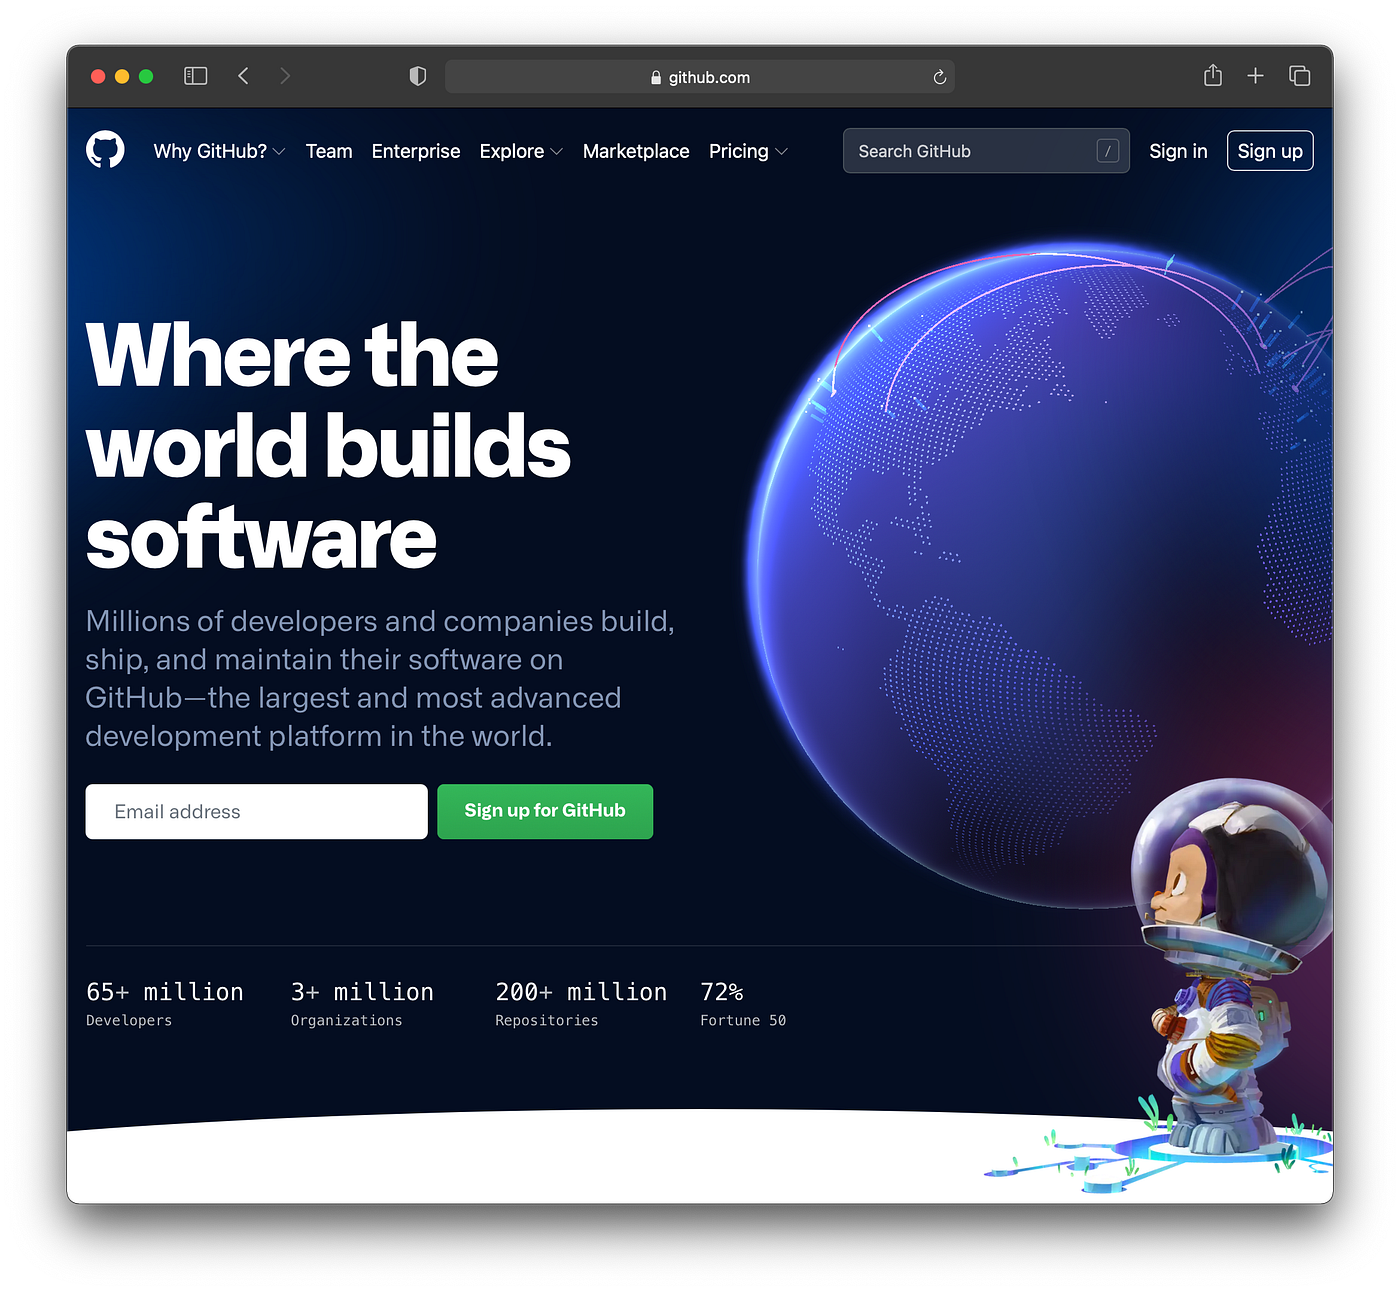
Head over to the GitHub website to sign up. (Link at the top right).
2. Creating a New Repository
So we’re now going to create a new repository which will act as a home for your new portfolio website. The contents of the website (i.e. text, images and any other files that you would like to display in your website) will be contained within this repository. Instead of an HTML webpage, the text that will be displayed on your website will be stored in a Markdown file ( .md file), which we will be working with in the next few minutes.
Log-in to your GitHub account and go ahead and start a new repository by clicking on the New repository button found in the drop-down menu that appears upon clicking on the + button found at the far right of the top navigation bar as shown in the screenshot below.

Start a New repository by clicking on the + symbol at the top right.
On this page, enter the name of your new repository. In this example, we are going to type in Portfolio but you are more than welcome to use any other name such as your full name (but make sure to use an underscore or dash instead of an empty space such as John_Doe or John-Doe).
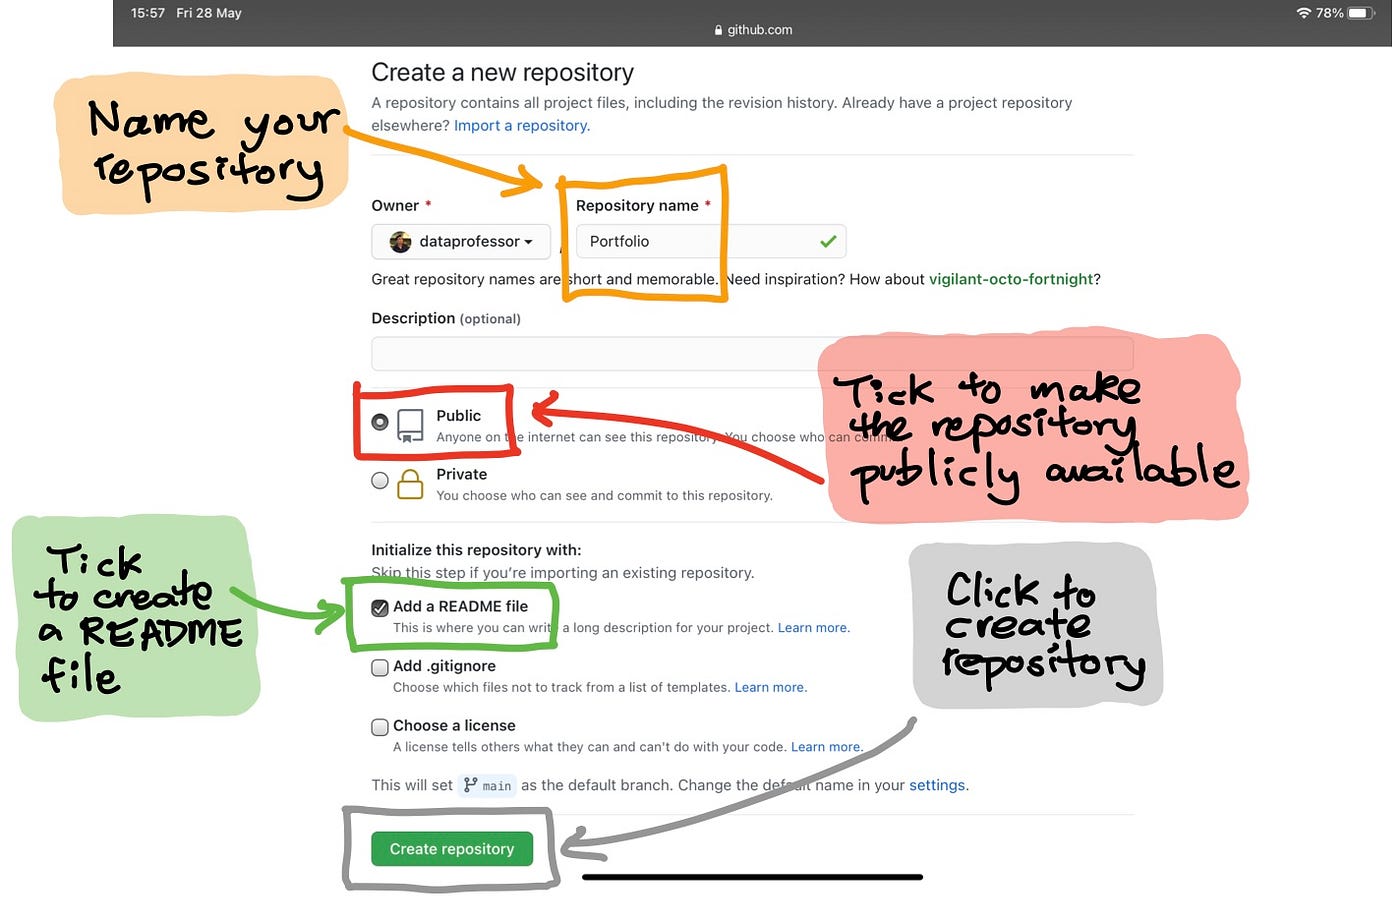
Enter the name of your new repository.
To allow the website to be publicly available, we tick on the Public option.
It should be noted here that we have ticked a box so that a README.md file will be automatically created along with the creation of the repository. It is this very file that the website content will be placed inside.
Finally, click on the Create repository button in order to actually create the repository.
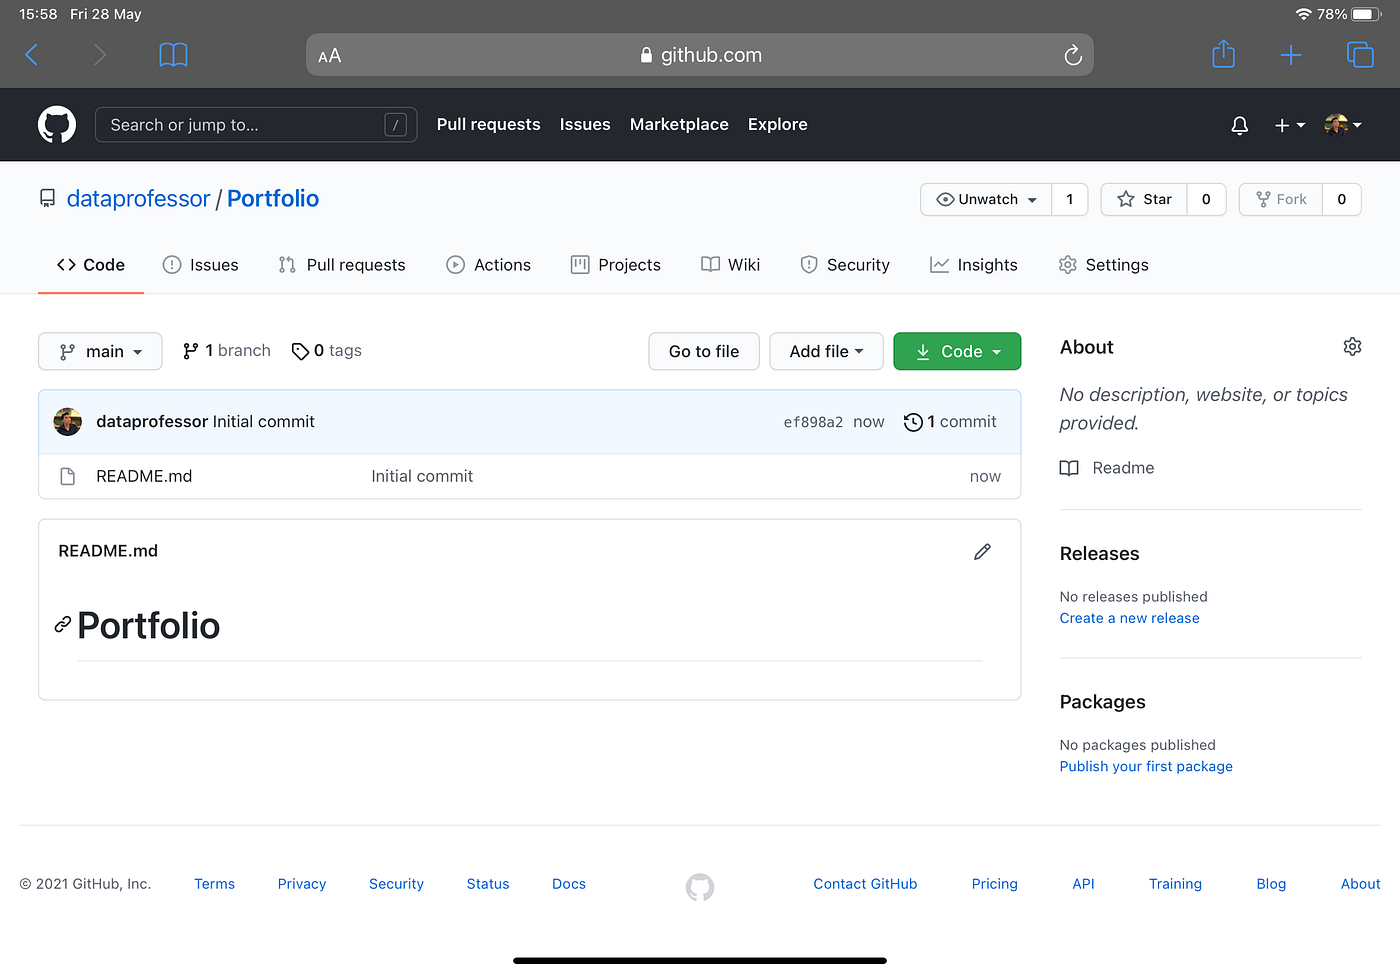
The screenshot below will show the main page of your new repository. Notice here that the contents of README.md is empty.
2. Setting up GitHub Pages for your Repository
By default, the repository is not yet a website and so we will have to activate GitHub Pages for it. To do this, click on the Settings button found at the far right of the tab (as shown by 1. yellow box in the image below).
Next, you want to click on the Pages button found on the left panel (as shown by 2. red box in the image below), which will reload the page.
To actually activate the GitHub Pages, click on the None drop-down button found under the Source sub-heading in the GitHub Pages section (as shown by the 3.1 green box in the image below) which will reveal the main branch and once it does, click on it (as shown by the 3.2 green box in the image below).
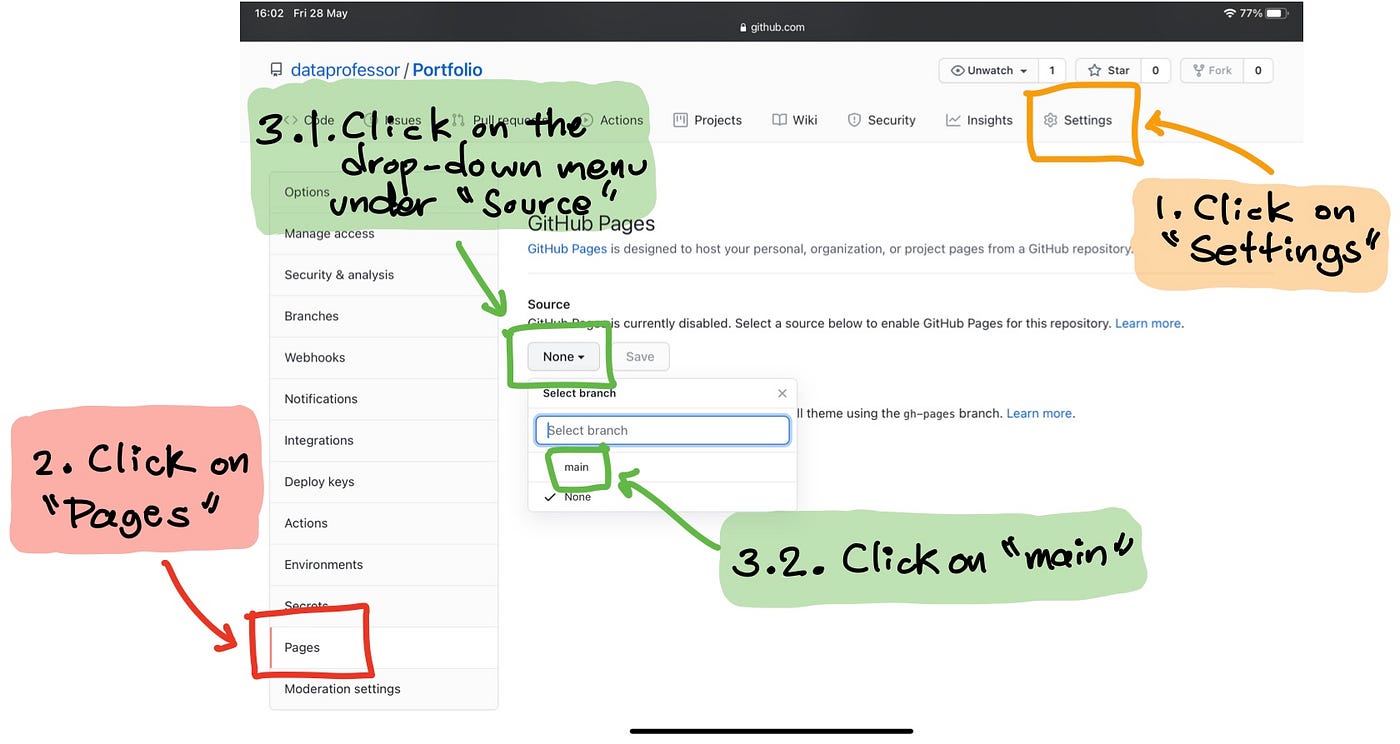
Activating GitHub Pages for the newly created repository.
Now that GitHub Pages is activated, you should be able to see the URL to your portfolio website as shown by the yellow highlighted box in the image below.
In this example, the URL that is being created is available at https://dataprofessor.github.io/Portfolio where dataprofessor is my GitHub username and Portfolio is the repository name. Make note of this URL and keep it handy as we will be going to it after we apply the website theme.
Also make note that the Branch is now set to main as shown in the red box in the image below.
Now, we will choose a theme for our website. Click on the Choose a theme button found under the Theme Chooser sub-heading.
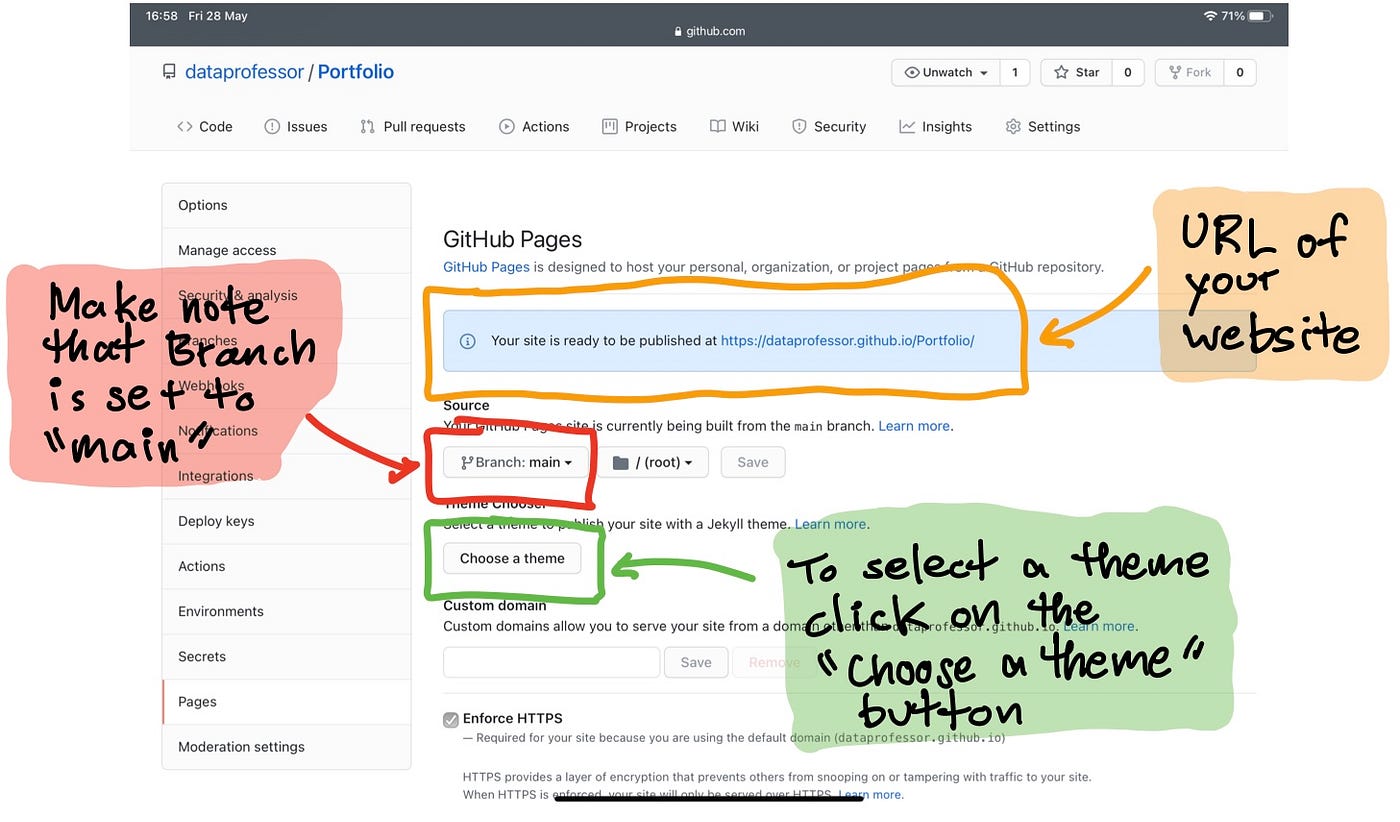
GitHub Pages is now activated and its URL are displayed. (shown by the yellow highlighted box)
As you will see in the screenshot below, there are several themes for you to choose from. In this example, we will select the Cayman theme and click on the Select theme button.
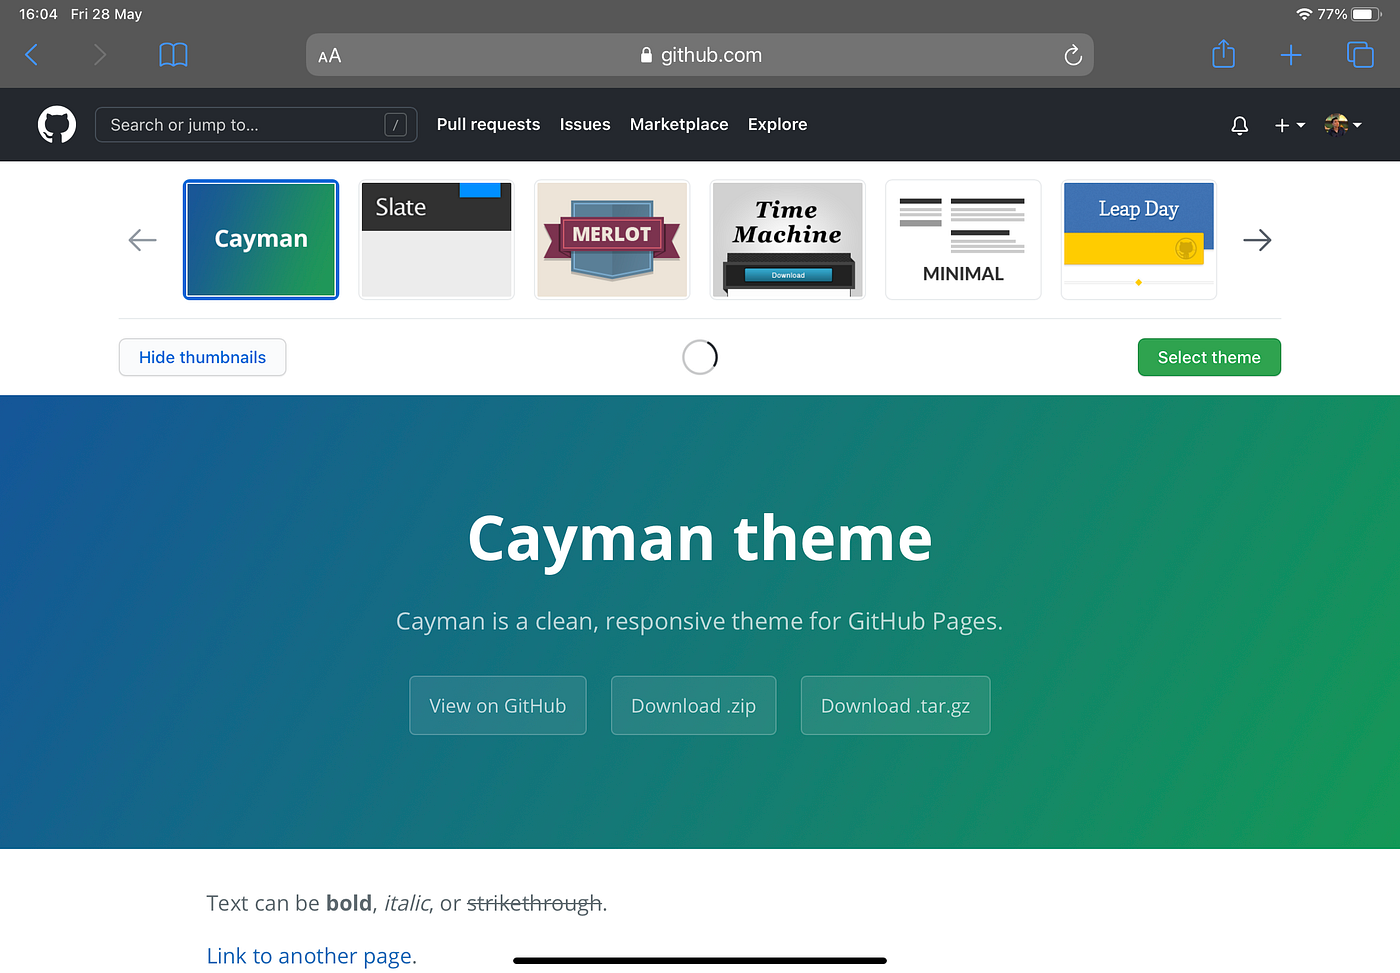
Selection of a theme for the portfolio website.
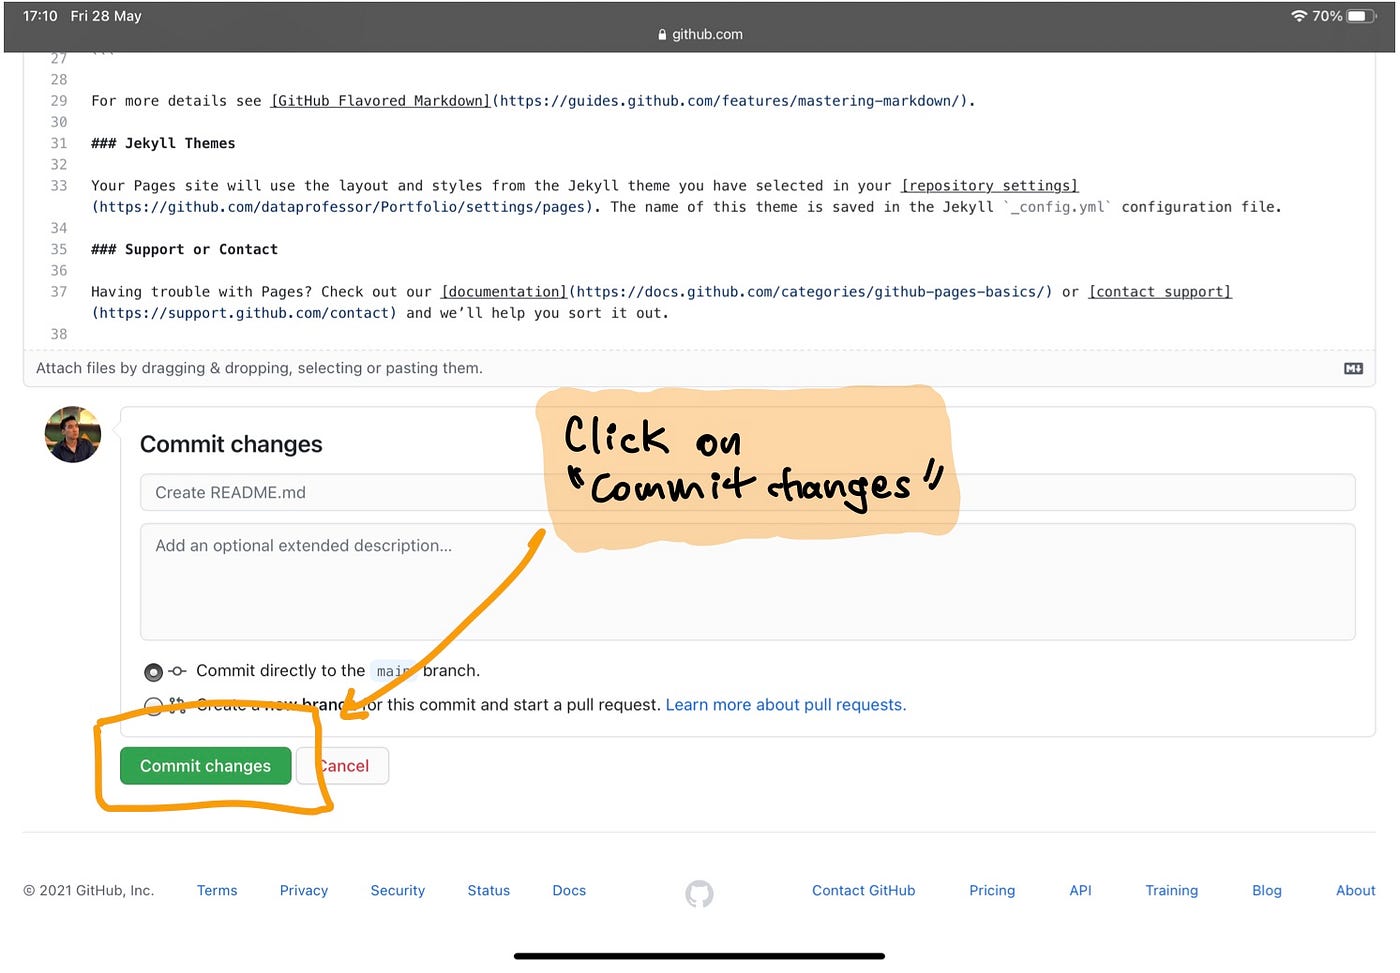
To get you started with the layout of your new website, you will see that the README.md file is now populated with example text.

Just scroll down to the bottom of the page and click on the Commmit changes button to proceed.
Now, head over to our website by pasting the URL that we took note of earlier, which in this example is https://dataprofessor.github.io/Portfolio.
The screenshot below shows our website with example contents that have automatically populated the README.md file upon selection of the theme.
Screenshot of the website with example contents.
3. Adding Our Information to the Website
Let’s now proceed to adding our own profile information into the website.
As I have mentioned earlier on, the contents of the website is contained within the README.md file, which we have also seen above where we have example contents upon choosing the Cayman theme.
In the code box below, I have provided you with a hypothetical profile information that you can use as a template.
Let’s copy and paste the contents below into the README.md file. To save the file, scroll down and click on the Commit changes button.
# John Doe
*An Aspiring Data Scientist | 2X Kaggle Grandmaster*

# Education
* Masters of Science (Data Science), *YouTube University*, 2016-2018
* Bachelors of Science (Data Science), *YouTube University*, 2012-2016

# [Project 1: Crypto Sentiment Analysis](http://youtube.com/dataprofessor)

This project integrates various news source for performing sentiment analysis pertaining to cryptocurrencies.
* **Python libraries used:** Streamlit, Huggingface, TensorFlow
* **Input:** Tweets, News
* **Output:** Sentiment of Cryptocurrency

# [Project 2: Crypto Trading Bot](http://youtube.com/dataprofessor)

This project makes use of ***sentiment analysis*** of cryptocurrency coupled with ***technical analysis*** in the trading of cryptocurrencies.
* **Python libraries used:** Streamlit, python-binance, cctx, talib
* **Input:** Cryptocurrency historical price
* **Output:** Trading signals triggers buying and selling
The contents of the code box above is written in Markdown, which is a topic for another blog post. For a Markdown cheatsheet that you can refer to when crafting your website, I highly recommend the one from adam-p.
Now, refresh the portfolio website again to see the newly added profile information.

Portfolio website of a hypothetical aspiring data scientist John Doe.
4. Adding Images to the Website
As a picture is worth a thousand words, let’s spice up the website with some images. For this example, we will be using photos from Unsplash, which provides a large collection of stock photos that you can use for free.
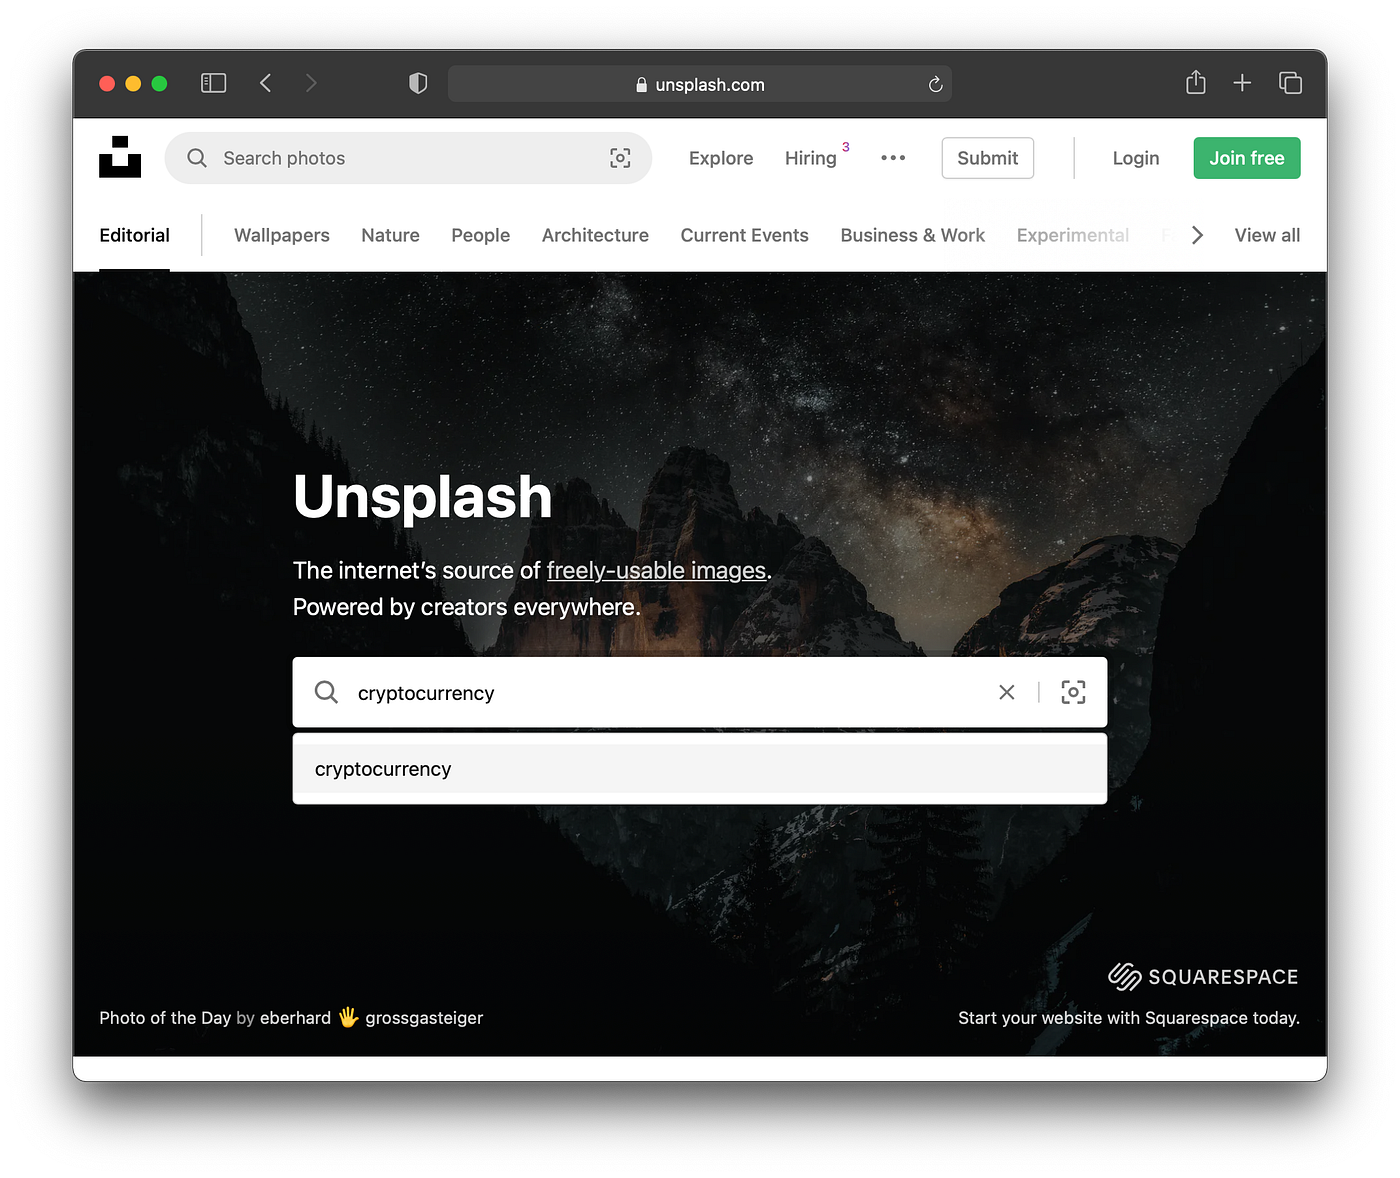
Searching for image to use in our website.
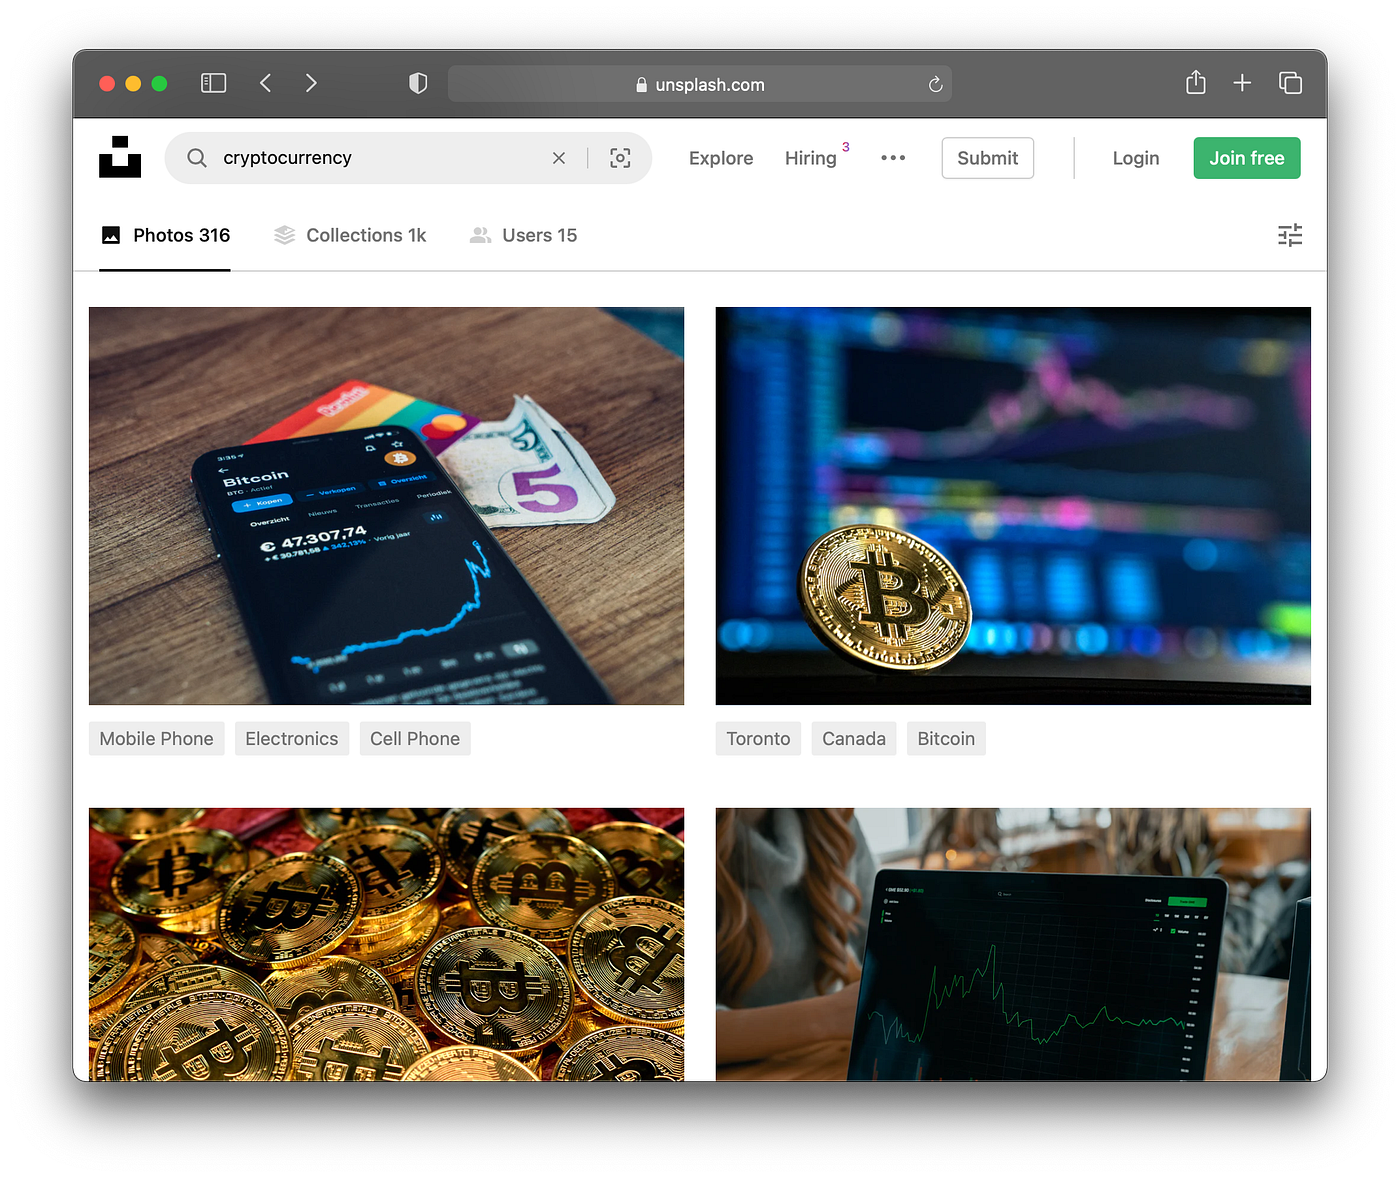
4.1. Finding an Image for Project 1
Let’s search for images to use for the portfolio website of our hypothetical aspiring data scientist John Doe. As you can see from the website, John Doe’s Project 1 is pertaining to cryptocurrency. Thus, we’re going to find some relevant images.
Below are the search results for images about cryptocurrency.
The top right image looks like a good fit for Project 1 and so let’s use that. So you can go ahead and click on it. A pop-up appears as shown below, then you click on the down arrow of the Download free button to trigger the drop-down menu. Here, we will go with the Small (640x427) resolution.
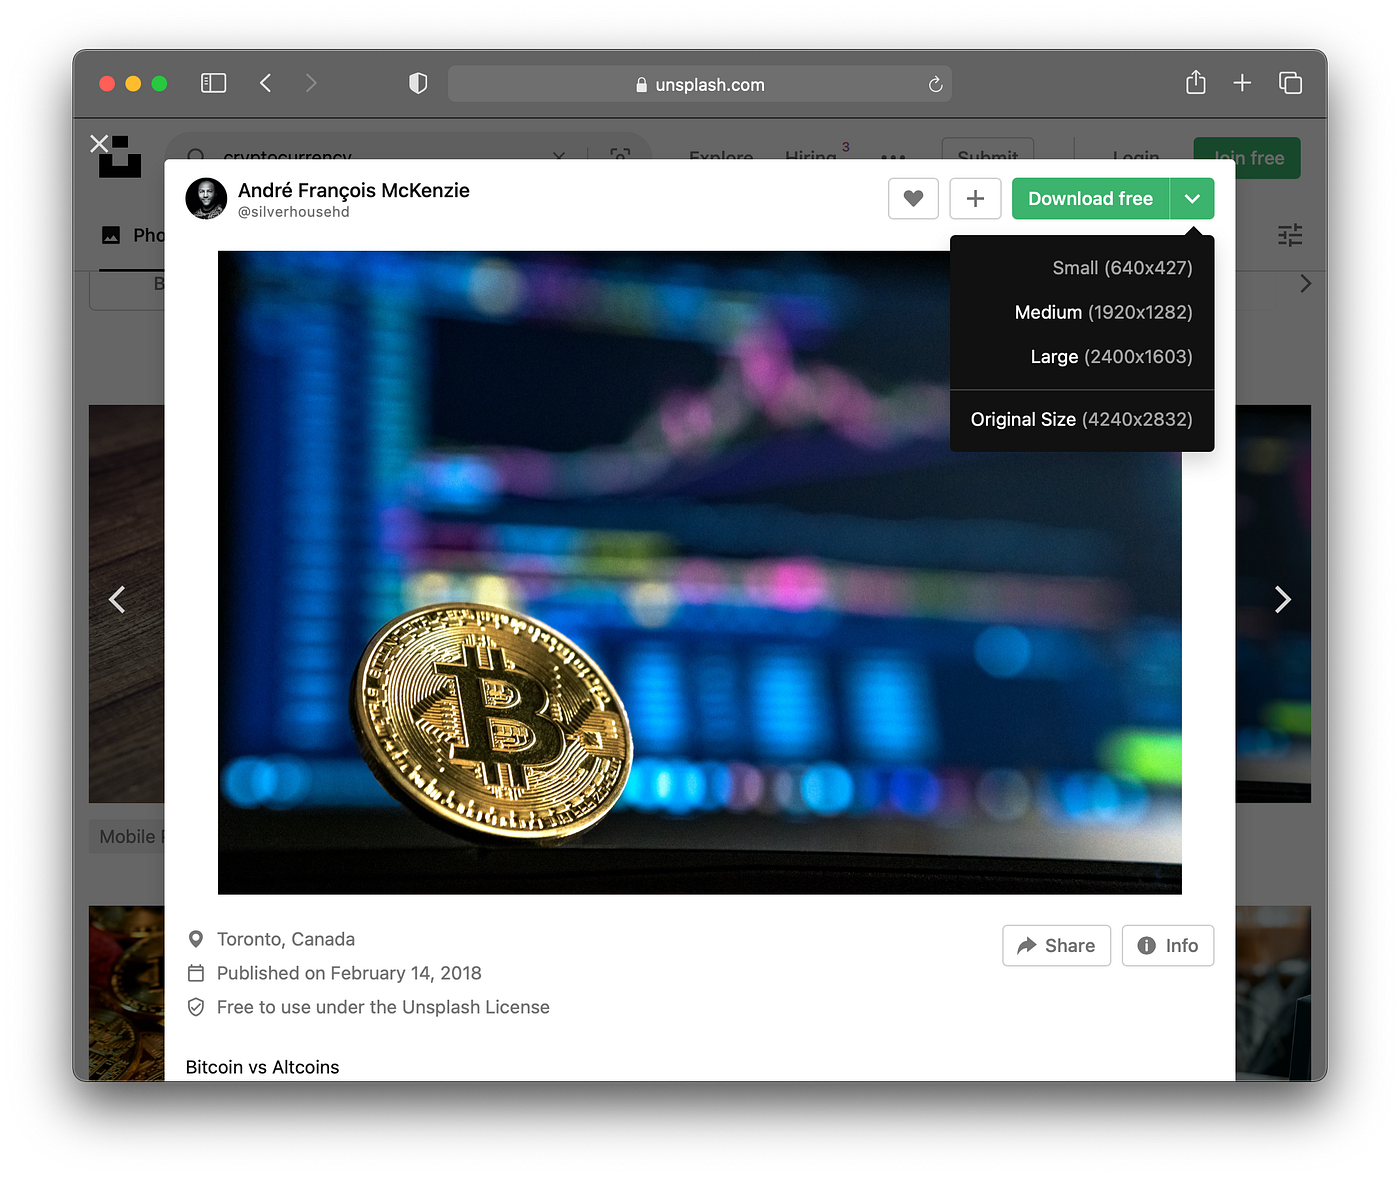
Image from Unsplash that we’re going to use for Project 1. Photo by André François McKenzie on Unsplash.
Upon downloading the image, a pop-up appears at the bottom that provides you with attribution text and link. You can simply click on the Copy to clipboard icon shown in the image below. We will be pasting this into the README.md file so that it such information is included in the portfolio website.
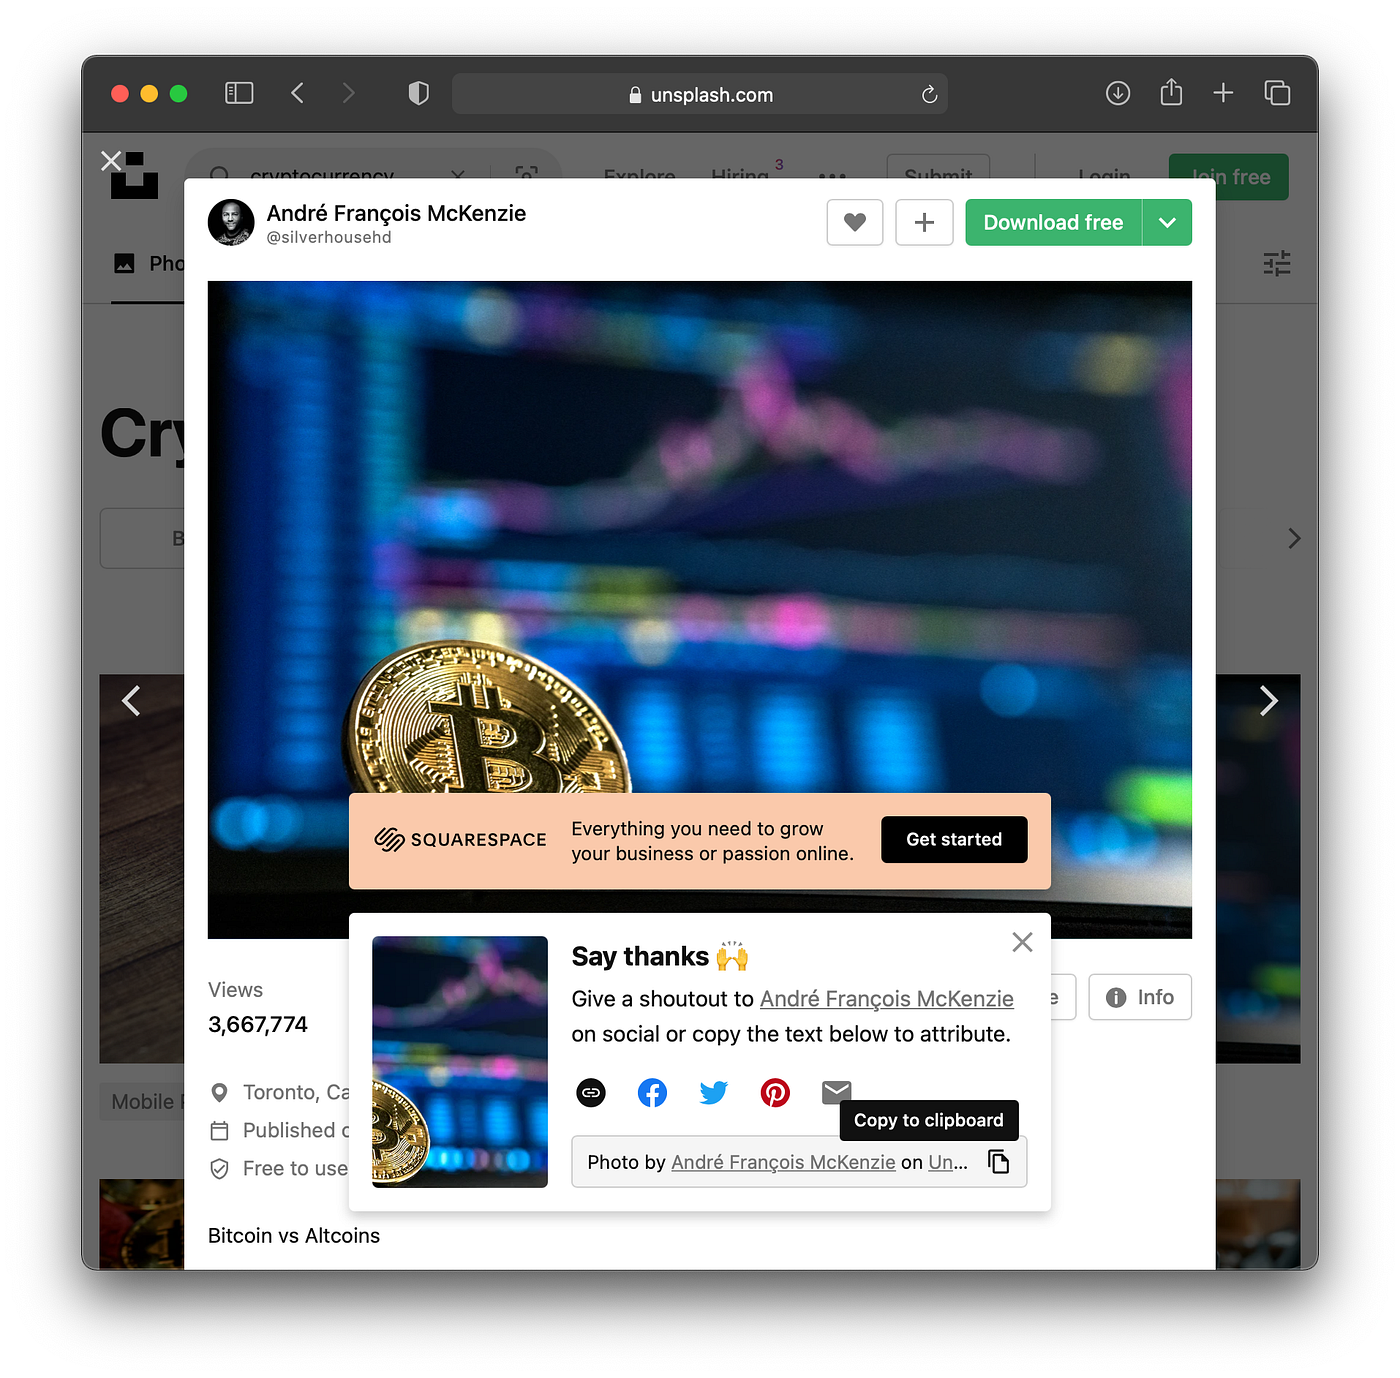
Screenshot of the attribution pop-up that appears upon downloading images from Unsplash.
4.2. Finding an Image for Project 2
As Project 2 (see the code box containing contents from the README.md file) of John Doe is about built a cryptocurrency trading bot then we’re going to use the following image.
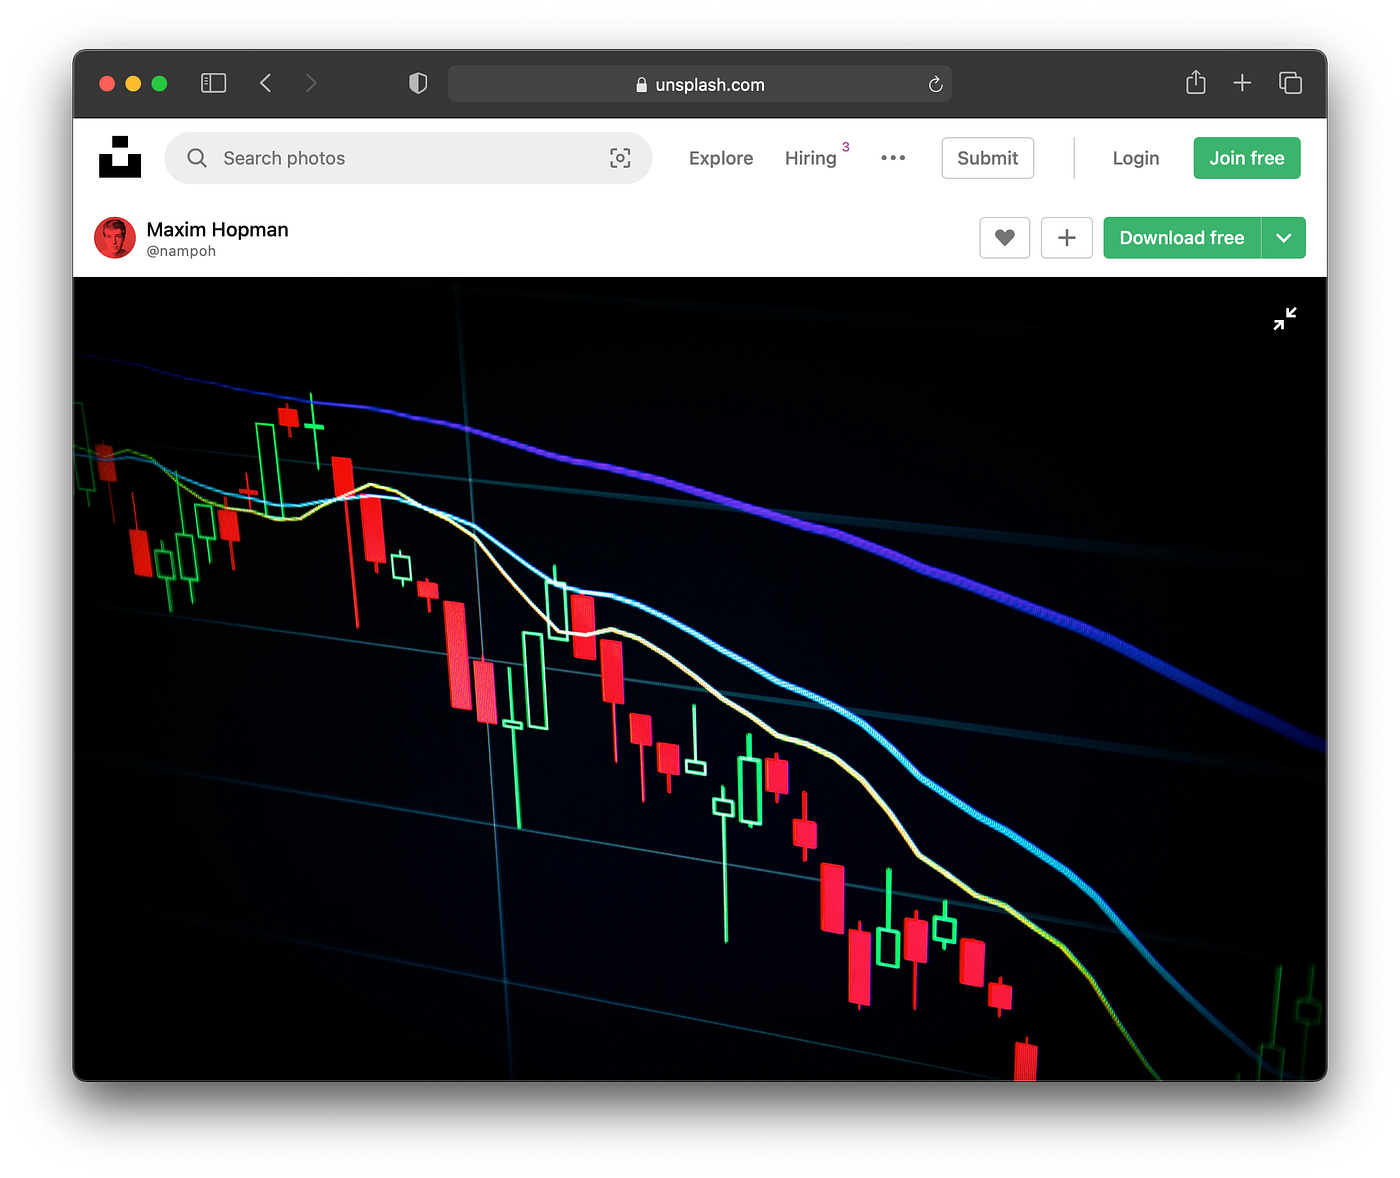
Image from Unsplash that we’re going to use for Project 2. Photo by Maxim Hopman on Unsplash.
4.3. Uploading Images to the GitHub Repository
Once the images are downloaded to your computer, let’s now upload it to our GitHub repository.
To do this, click on the Add file button which will bring a drop-down. Click on the Upload files link.
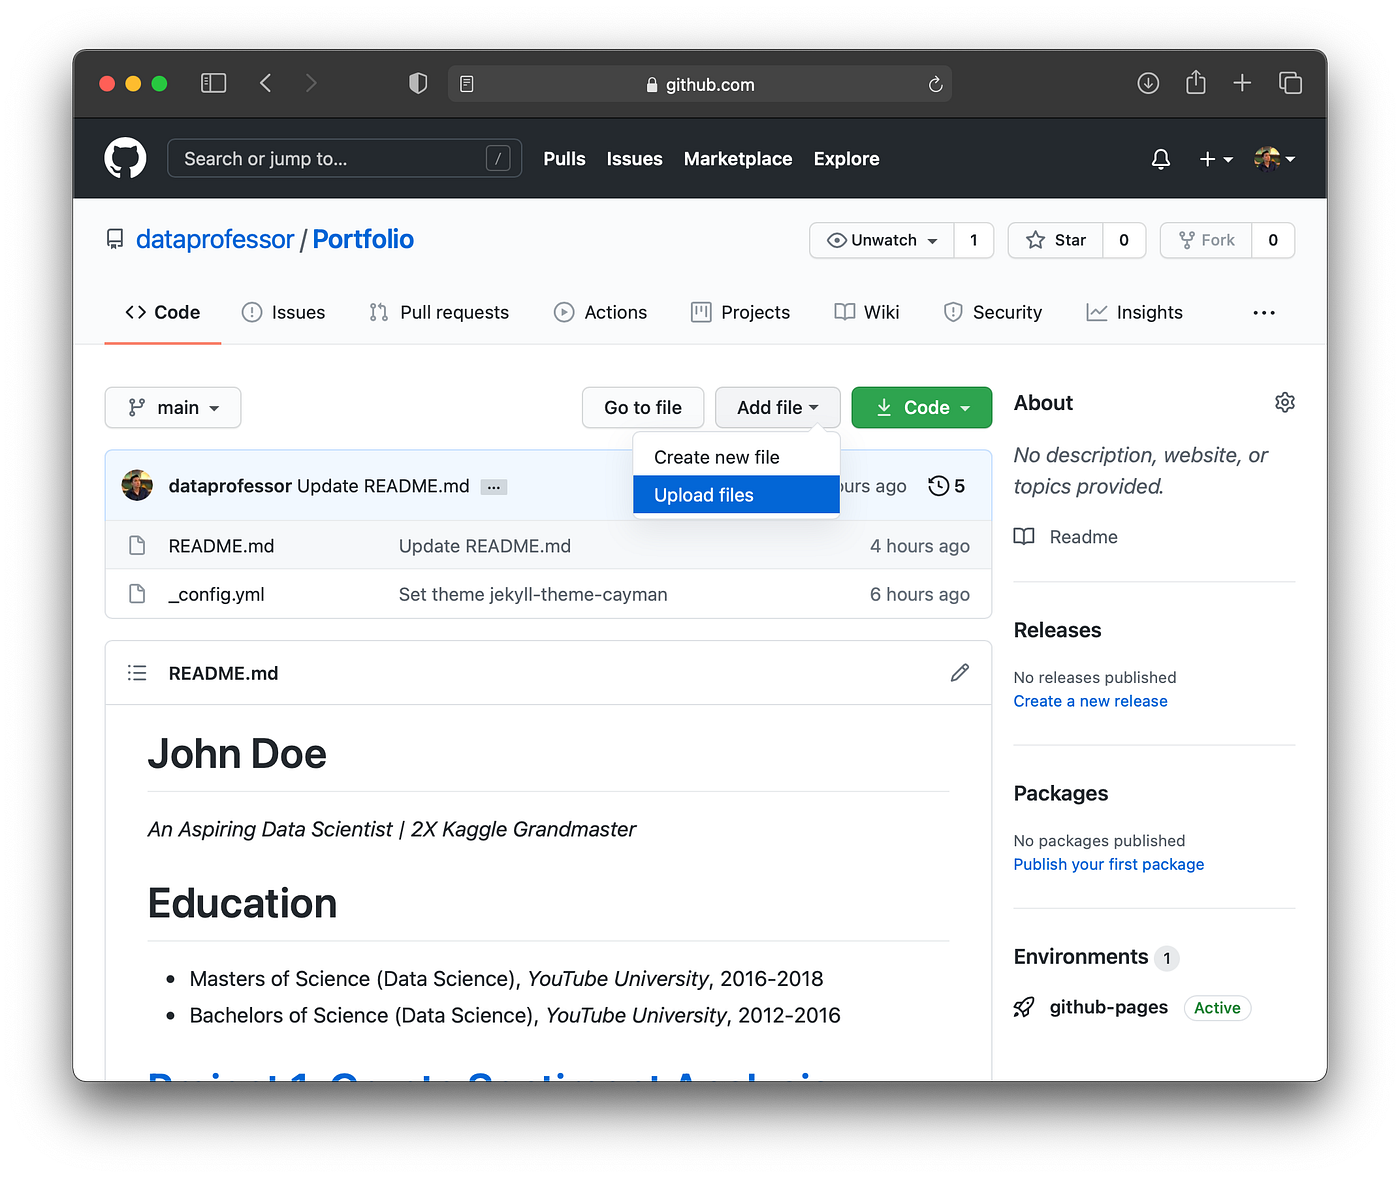
Screenshot of the “Upload files” link upon clicking on the “Add file” button.
Files can be uploaded in 2 ways: (1) drag and drop files directly into the upload box or (2) click on the choose your files link found inside the upload box. Afterwards, click on the Commit changes button found at the bottom of the page.
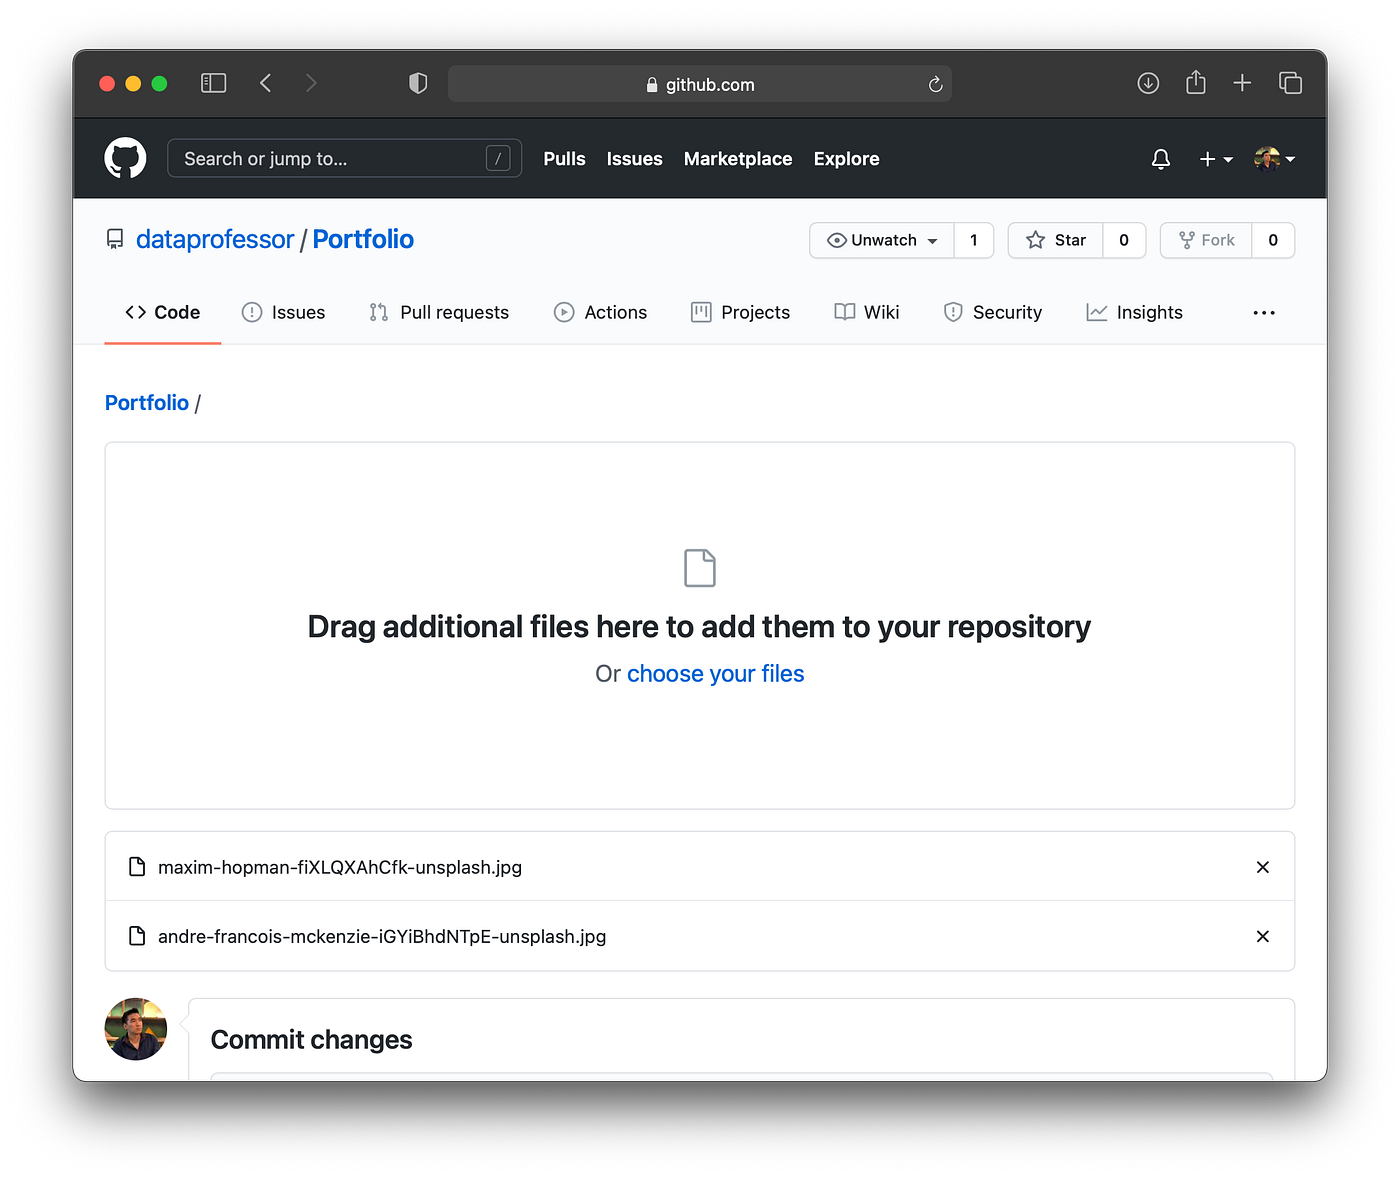
Upload files by drag-and-drop directly into the upload box or by clicking on the “choose your files” link. (This brings up a window that allows us to select the file to upload).

Screenshot of the GitHub portfolio. Here we can see that there are 4 files consisting of the 2 uploaded images, the README.md file and the _config.yml file (automatically generated after theme selection).
4.4. Adding Attributions to the Image in the Website
In using the free image from Unsplash, it is also a good practice to provide citations to the image. For your convenience, as you download images from Unsplash the pop-up that appears gives you the option to get the attribution text and link (as shown in the last image of section 4.1), which you want to copy and paste into the README.md file.
The following 2 attribution code blocks look like so for Project 1 and Project 2, respectively:
Project 1
Photo by
 <a href="https://unsplash.com/@silverhousehd?utm_source=unsplash&utm_medium=referral&utm_content=creditCopyText">
   André François McKenzie
 </a> on
 <a href="https://unsplash.com/s/photos/cryptocurrency?utm_source=unsplash&utm_medium=referral&utm_content=creditCopyText">
   Unsplash
 </a>
Project 2
Photo by
 <a href="https://unsplash.com/@nampoh?utm_source=unsplash&utm_medium=referral&utm_content=creditCopyText">
   Maxim Hopman
 </a> on
 <a href="https://unsplash.com/s/photos/cryptocurrency-trading?utm_source=unsplash&utm_medium=referral&utm_content=creditCopyText">
   Unsplash
 </a>
To actually add the image to the website via the Markdown syntax, we will use the following line of codes for Project 1 and Project 2, respectively:
Project 1
Project 2
Let’s add the above 4 code blocks underneath the headings of Project 1 and Project 2 in the README.md file and we will get the following code:
# John Doe
*An Aspiring Data Scientist | 2X Kaggle Grandmaster*
# Education
* Masters of Science (Data Science), *YouTube University*, 2016-2018
* Bachelors of Science (Data Science), *YouTube University*, 2012-2016
# [Project 1: Crypto Sentiment Analysis](http://youtube.com/dataprofessor)

Photo by <a href="https://unsplash.com/@silverhousehd?utm_source=unsplash&utm_medium=referral&utm_content=creditCopyText">André François McKenzie</a> on <a href="https://unsplash.com/s/photos/cryptocurrency?utm_source=unsplash&utm_medium=referral&utm_content=creditCopyText">Unsplash</a>
This project integrates various news source for performing sentiment analysis pertaining to cryptocurrencies.
* **Python libraries used:** Streamlit, Huggingface, TensorFlow
* **Input:** Tweets, News
* **Output:** Sentiment of Cryptocurrency
# [Project 2: Crypto Trading Bot](http://youtube.com/dataprofessor)

Photo by <a href="https://unsplash.com/@nampoh?utm_source=unsplash&utm_medium=referral&utm_content=creditCopyText">Maxim Hopman</a> on <a href="https://unsplash.com/s/photos/cryptocurrency-trading?utm_source=unsplash&utm_medium=referral&utm_content=creditCopyText">Unsplash</a>
This project makes use of ***sentiment analysis*** of cryptocurrency coupled with ***technical analysis*** in the trading of cryptocurrencies.
* **Python libraries used:** Streamlit, python-binance, cctx, talib
* **Input:** Cryptocurrency historical price
* **Output:** Trading signals triggers buying and selling5. The Completed Portfolio Website
Congratulations! You have now completed the creation of the portfolio website in less than 10 minutes!
Example Portfolio Website: https://dataprofessor.github.io/Portfolio/

You can now share your portfolio website to the world (e.g. include the URL in your profiles on LinkedIn, Twitter, name card, etc.)! Remember to maintain as well as periodically update the website as your list of projects grow.
Feel free to share with me the links to your portfolio websites.
Created (with license) using the image by alexacrib from envato elements.